Device ID:
Get this from the core area when logged in
31=Raspberry PI, 6=Photon
Direct microprocessor looped control
output here
Can also use on and off or 1 and 0
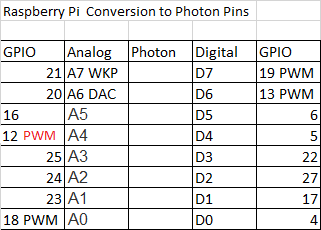
Note that Advanced users can also use the pin numbers, so D7 = pin 7 on Photon but D7 = GPIO 19 on the Raspberry PI
Photon Direct Analog input, PI uses capactive Input both returns 0-4095
Powerful
Medium
Off, These are PWM 0-255
Delete the following after finished testing
If using a sensor edit the below code to set your values to a correct amount with units:
: Volts
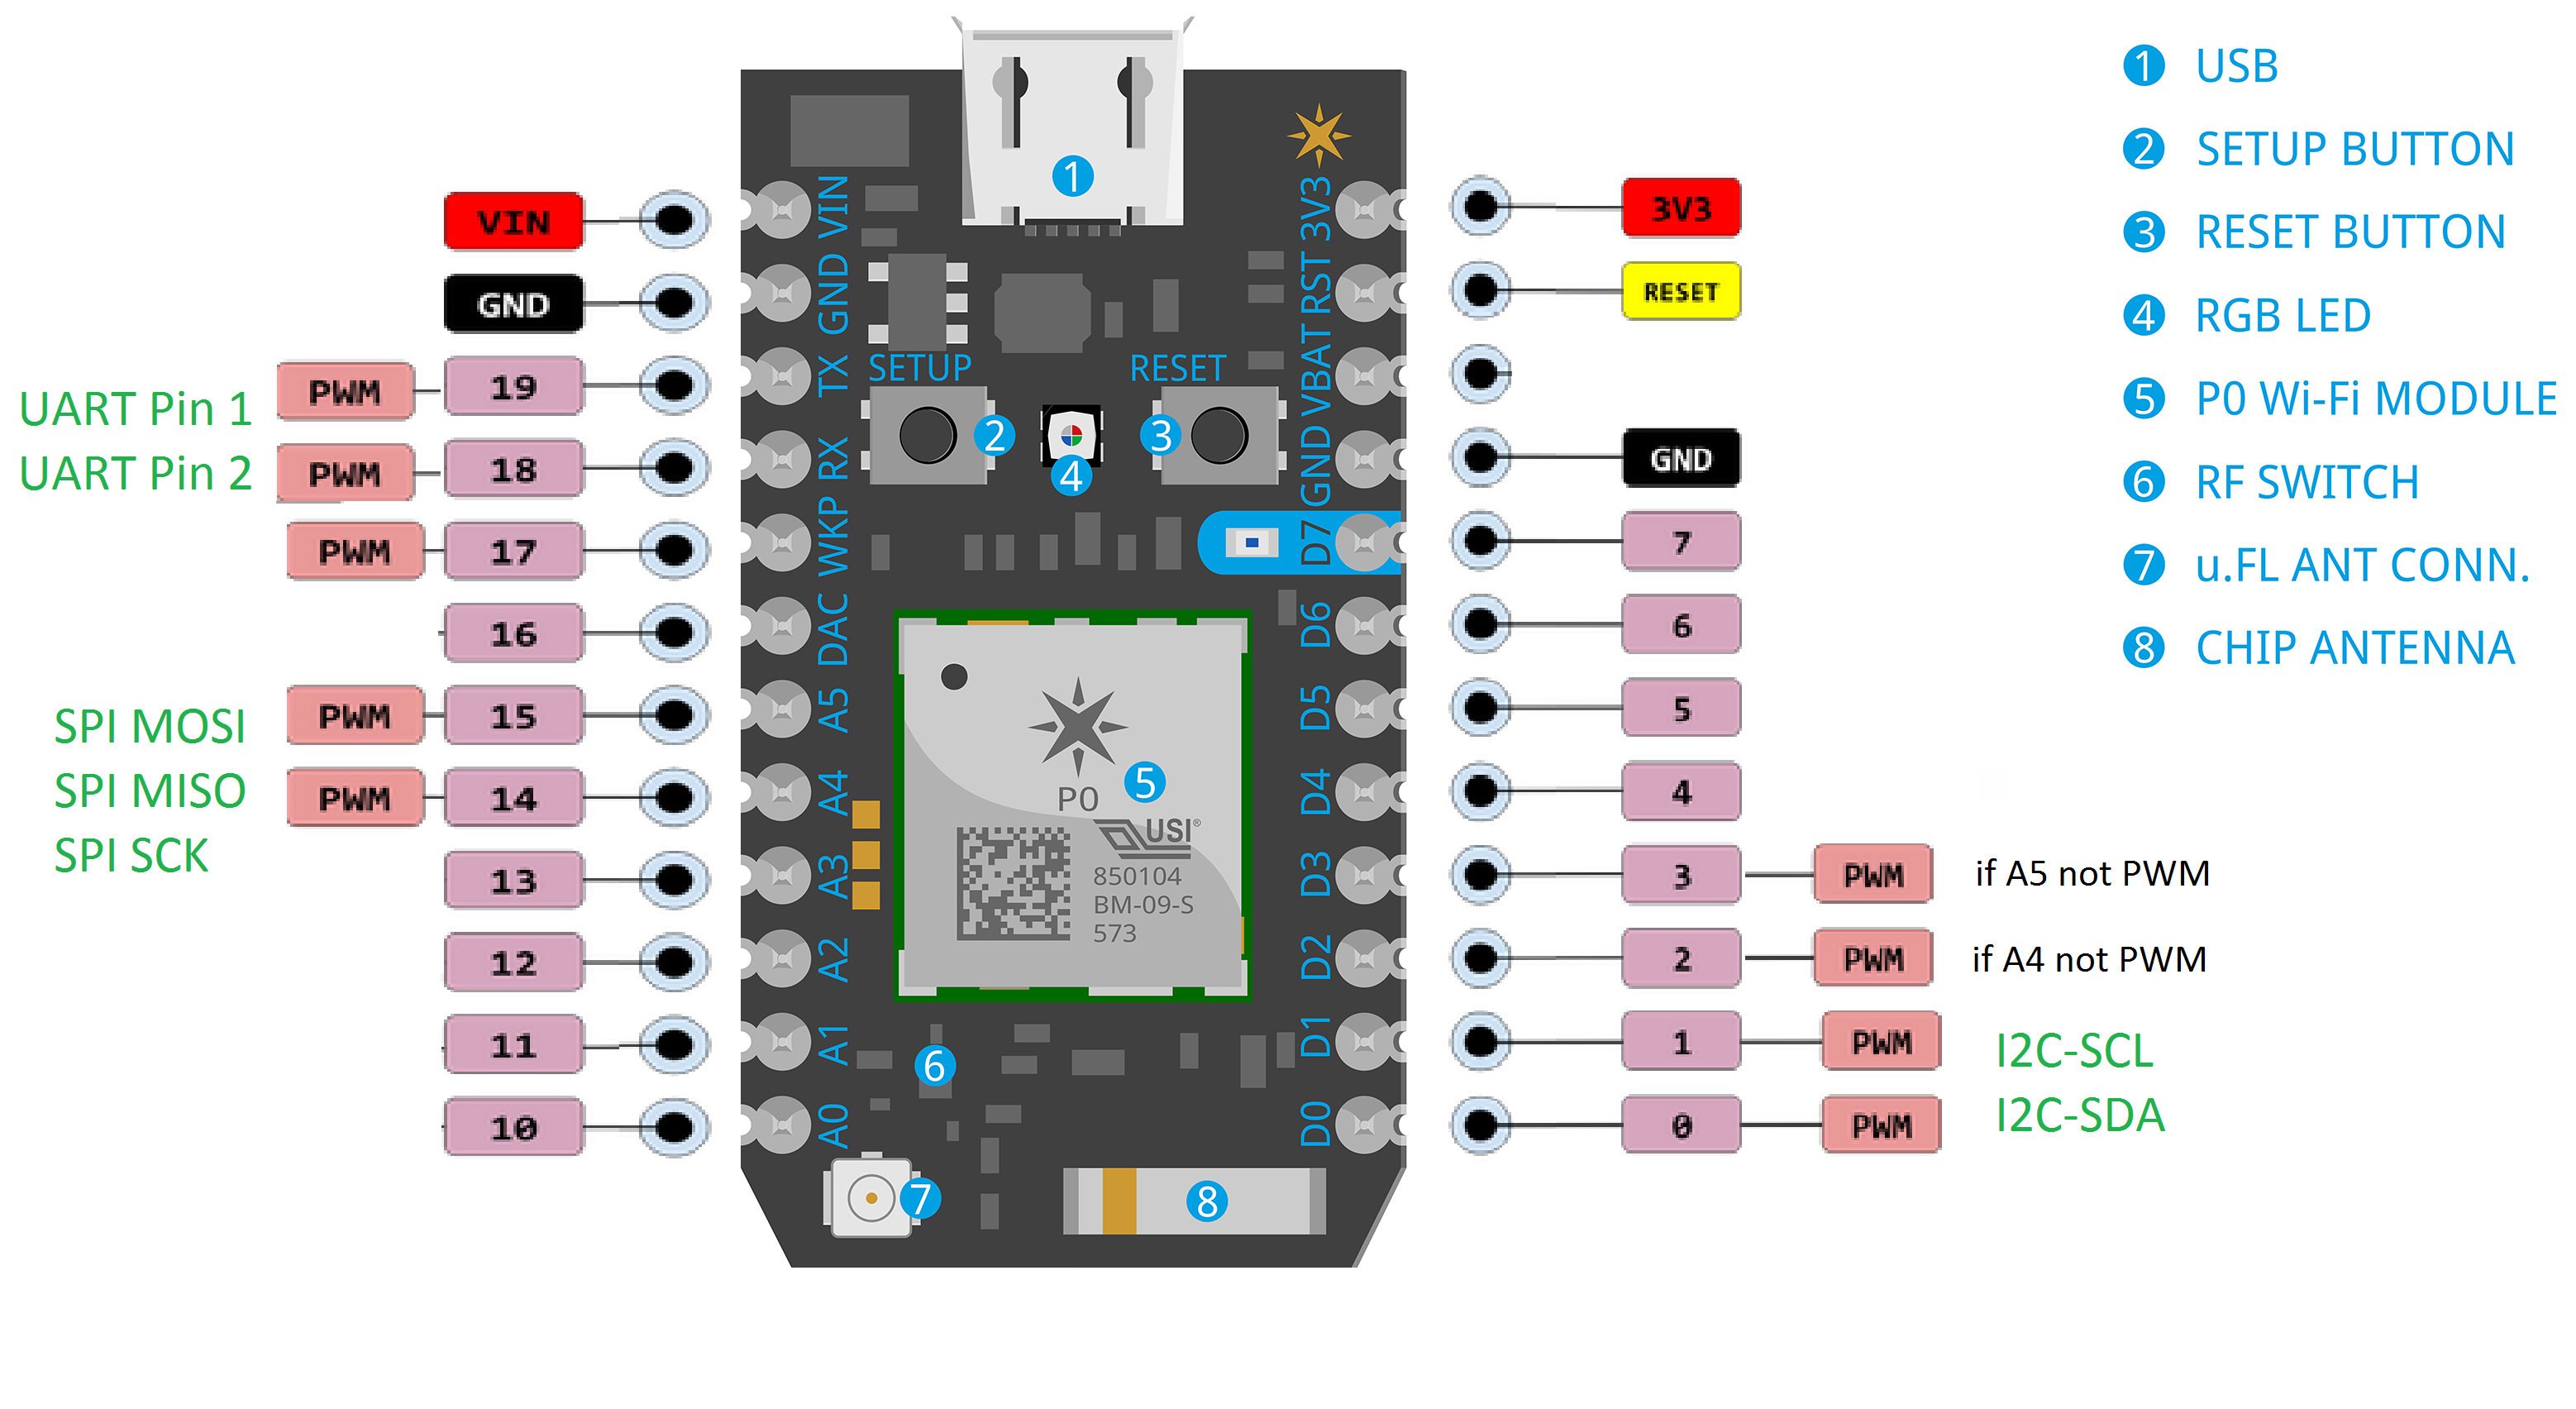
On the Photon
Note: Analog sensors A0-A7 read from 0-4095
Note: PWM from 0 to 255 and works on the following 7 pins
D0, D1, (A4 or D2), (A5 or D3), WKP=A7, RX, TX
Serial - I2C
D0 = SDA
D1 = SCL
Serial - SPI
A5 = MOSI
A4 = MISO
A3 = SCLK
Serial - UART
TX = Serial Pin 1
RX = Serial Pin 2
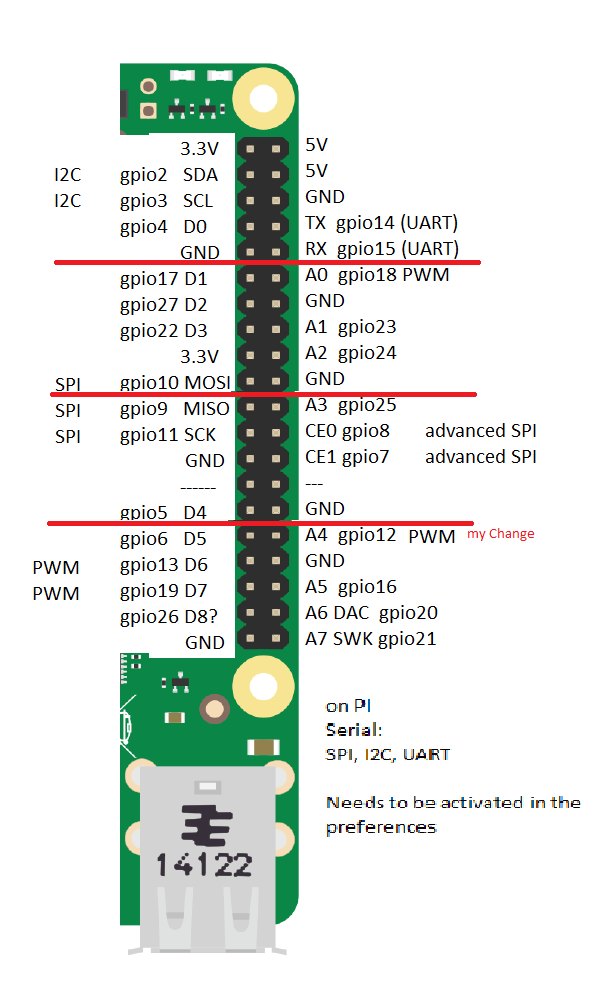
For the Raspberry PI
GPIO pins at: 2-27 Some are preset pull-up.
Note: PWM! only at GPIO pins: 13, 16, 18, 19
Note: The Raspberry PI does not have analogRead ability, so I have tricked the PI into thinking A0-A7 are Analog Reads by assuming a
capacitor is being used and a very fast loop is counting the number of loops until the capacitor is charged.
The circuit goes: 3V3 --> variable resistor --> (Branching to GPIO pin ) --> 0.10 uF Capacitor --> 100 ohm resistor --> GND
Serial - I2C
GPIO 2 = SDA
GPIO 3 = SCL